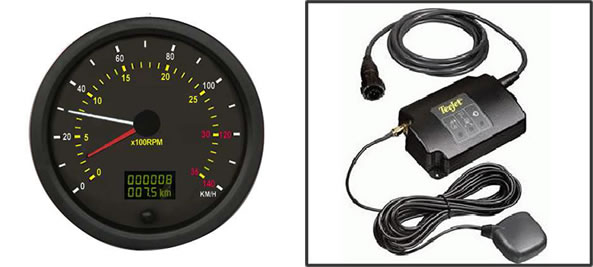
VDO GPS Speedometer with GPS Sensor
Our GPS sensor can be used with any electronic VDO speedometer.
A revolutionary product in the transport industry.
- No more Cables.
- No Engine takeoffs.
Please feel free to contact us with your requirements.
Operating Instructions For Electronic Speedometer
1) Press and hold “Trip” button
2) Switch on ignition and start vehicle
3) Speedo will alternate between the following :
a) Pulse
b) Auto Cal
c) Adjust
4) When “Auto Cal “is displayed on speedo release “Trip “ button
5) Move to the start of 1 km test track
6) Push “Trip“ button once. “Start” will be displayed on speedo
7) Move to the end of 1 km Test Track and stop on mark
8) Push “Trip “button once work and turn then turn off ignition to start calibration .
NB : “Error “ displayed on speedo – there was a problem with the signal.
VDO Cockpit Vision, VDO Cockpit International, VDO Module Cockpit II
1. Function 'Adjust'

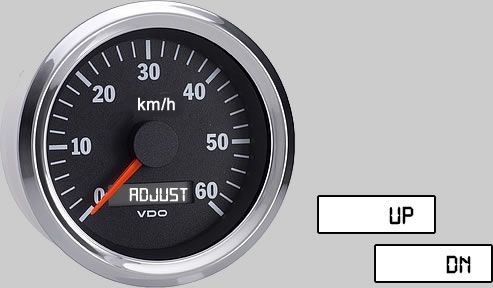
After selection of the function 'AdJust' the display alternates between 'UP' or 'dn' (up / down) after 3 seconds.
 Only use this function on the roller test bench! Only use this function on the roller test bench!
The fine adjustment is only possible between 30% and 100% of the indicating range. No pulse/distance ratio counting takes place during fine adjustment.
Pushing and holding the button when 'UP' is displayed increases the pointer indication ('dn' will lower it accordingly). Initially the change of the indication will be very slow for a very precise adjustment. Releasing the button for a short time repeats the cycle. The rate of pointer indication change increases when the button is held for a longer time. Release the button when the pointer indication corresponds to the reference speed. After 1 minute the display shows total or partial distance. Fine adjustment has been complete.
A wrong pulse / distance ratio entry (function 'PULSE') exists if the display starts flashing during fine adjustment. The pulse/distance ratio is either below 500 or above 399990. Repeat the calibration with the function 'PULSE'.
2. Operation

Briefly pushing the button alternates the total distance displays (e.g '99910.9') with the partial distance displays (e.g 't 176.8').
The total distance function counts the total mileage in kilometers or miles up to 999999.9 max.. This display cannot be reset.
The partial distance function counts the mileage in kilometers or miles up to 't9999.9'. This displays is reset to 't0.0' by pushing the button (for 2 seconds approximately).
Pushing the button for 2 seconds when total distance is displayed will also reset the partial distance to 't0.0'.

Trip and total distance remain stored after the opening voltage is switched off.
3. Speed Display
Note
 When ignition is switched off, the pointer remains at the last speed indicated, until the ignition is switched on again, without starting the engine, the pointer will then return to the zero position. When ignition is switched off, the pointer remains at the last speed indicated, until the ignition is switched on again, without starting the engine, the pointer will then return to the zero position.
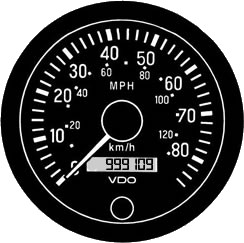
A. Round VDO Instruments
A1. Electronic Speedometer
A1.1 VDO cockpit vision, VDO cockpit international
Settings
3 alternatives can be used for setting the instrument:
2 options for pulse / distance ratio setting:
Function 'AUtOCL' automatic calibration by driving a measuring distance (1 km or 1 mile)
Function 'PULSE' enter a known pulse / distance ratio
1 possibility for fine adjustment of the speed indication:
Function 'AdJUST' Calibration using a reference speed indication (roller test bench)
Note: Respect: The tolerances per Directive 75/434/EEC when calibration the speed indication.
A reference to them is made in 57 StVZO. Chapter 4, Requirements, states
4.3.5 . The vehicle is tested at the following speeds: 40 km/h, 80 km/h and 120 km/h
or 80 % of the maximum speed specified by the manufacturer if it is lower than
150 km/h.
4.3.6. The error limit of the instruments used for the measurement of the effective
vehicle speed shall not exceeds + 1 %.
4.3.6.1. If a measuring track is used, it shall be level and dry, and have a sufficiently
non-skid surface.
4.4. The displayed speed shall never be lower than the effective speed. At the
speed specified under 4.3.5 and at the intermediate values the difference
of speed V1 displayed by the speedometer and effective speed V2 shall have
the following relation.

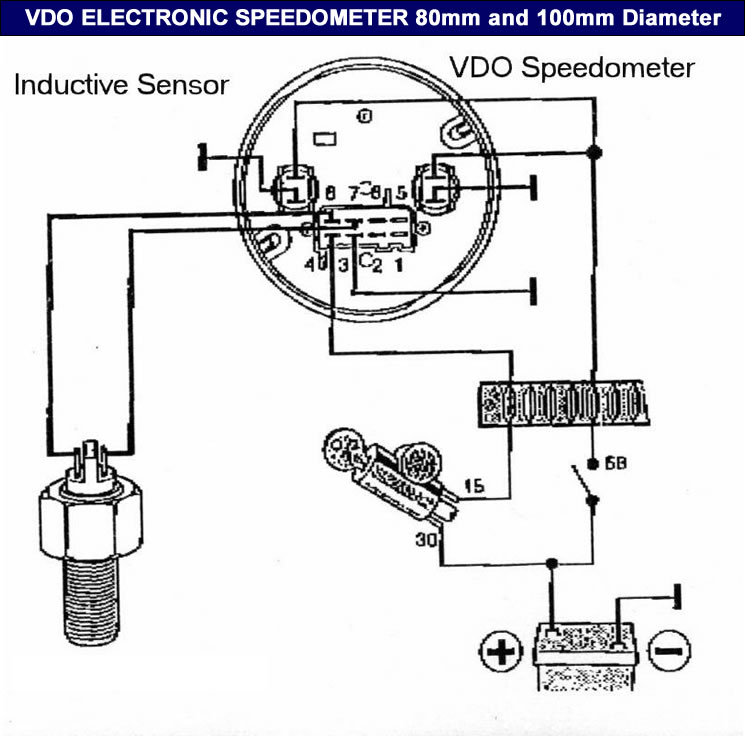
Connections
Pin 2: +12 V for sensor
Pin 3: Ground (terminal 31)
Pin 4: +10.8 V to +32 V (terminal 15)
Pin 6: +12 V for open collector sensor
Pin 7: Ground for two-wire sensor line
Pin 8: Sensor signal input
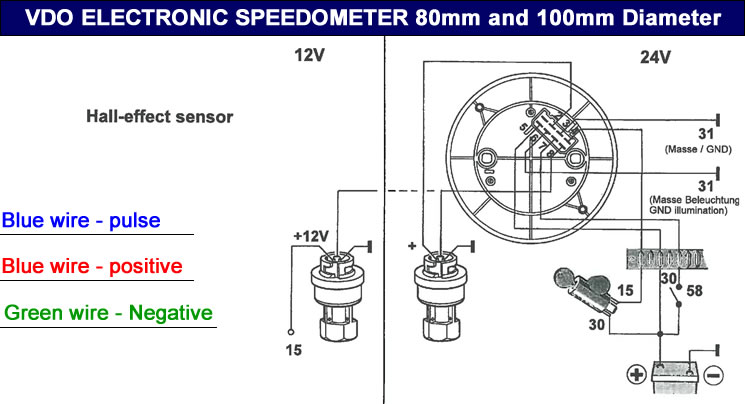
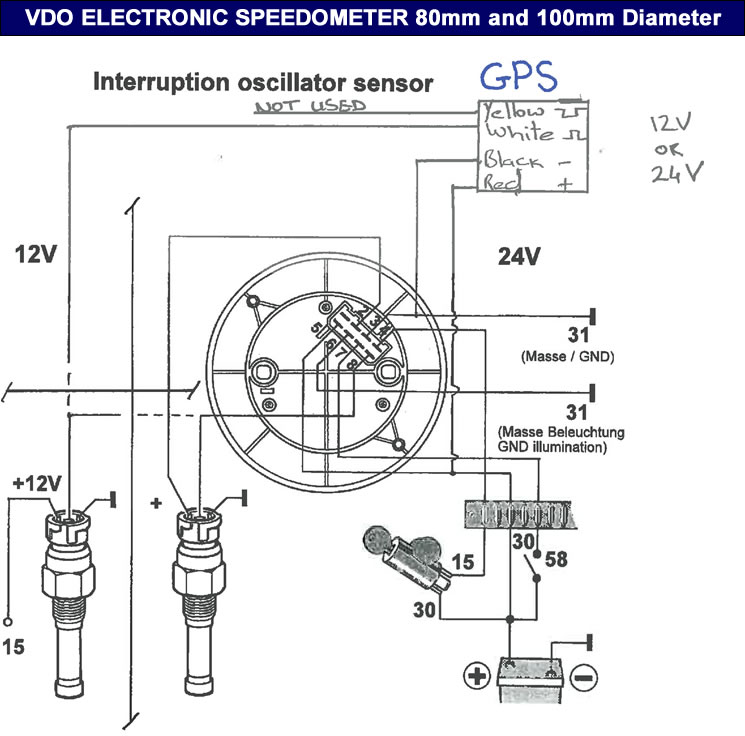
Hall sensor with open collector output Pins 6 and 8 must be jumper for hall sensors with open collector output.
Settings
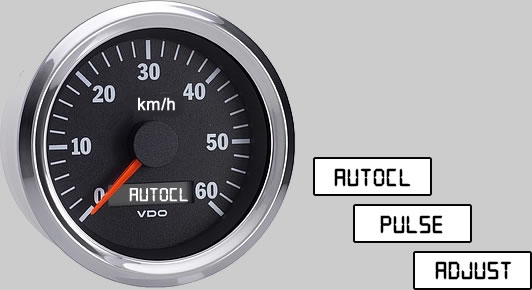
Push button in front lens and keep pushed.
Keep the ignition (operating voltage) on.
The display alternates between 'AUtOCL' 'PULSE' and 'AdJUST' at 2 seconds interval.
Select a function by releasing the push-button when this function is displayed.
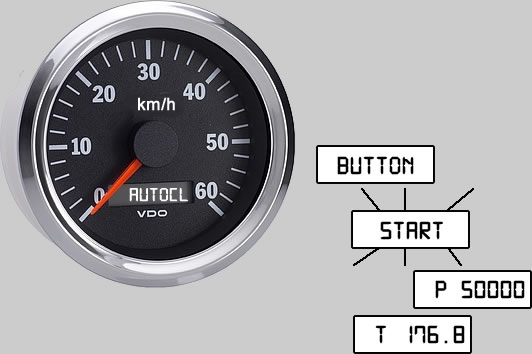
After selection of the function 'AUtOCL' the display changes to 'bUttOn' after three seconds:
 Ask the passenger to do the calibration! Ask the passenger to do the calibration!
No speed is displayed during the measuring drive
Start the vehicle and drive to measuring track. Exactly at the beginning of the track push the button shortly, the display flashes 'StArt'. Drive the test track with as constant a speed as possible. Exactly at the end of the measuring track again shortly push the button. The determined pulse / distance ratio is displayed if it is between 500 and 399 990 pulse (e.g P 50 000, which corresponds to pulse / distance ration 50 000). The calibration is completed if the display changes to total or distance display.
Repeat the calibration if the display flashes 'F00' (no pulses). The sequence is the same as described above
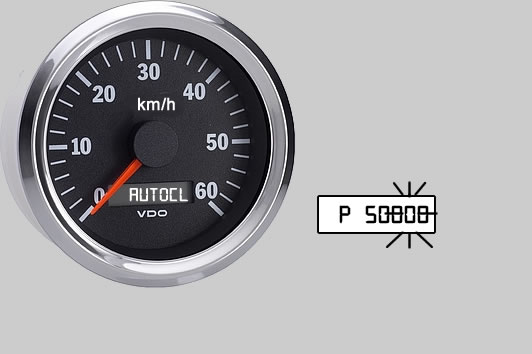
After selection of the function "PULSE" the display shows "P50 000" , for instance, after three seconds, with the digit before the last one flashing Start entering the pulse / distance ratio immediately. The flashing digit is changed by pushing the button (adjustable pulse / distance ratio 500 to 399 990). After entry of the pulse / distance ratio the display changes to total or partial distance display, the calibration is completed.
A new setting is required if the digit before the last one is flashing in the displays after pulse / distance ratio setting. The sequence is the same as described above.
The function 'PULSE' can be used to check the pulse / distance ratio stored by automatic calibration (function 'AUtOCL') The stored pulse / distance ratio is displayed (e.g P 50 000), and the digits start flashing, beginning with the digit before the last one.
After selection of the function "AdJUSt" the display alternates between "UP" and "dn" (up / down) after three seconds.
 Only use this function on the roller test bench! The fine adjustment is only possible between 30% and 100% of the indicating range. No pulse / distance ratio counting takes place during fine adjustment. Only use this function on the roller test bench! The fine adjustment is only possible between 30% and 100% of the indicating range. No pulse / distance ratio counting takes place during fine adjustment.
Pushing and holding the button when "UP" is displayed increases the pointer indication ("dn" will lower it accordingly). initially the change of the indication will be very precise adjustment. Releasing the button for a short time repeats the cycle. The rate of pointer indication change increases when the button is held for a longer time. Release the button when the pointer indication corresponds to the reference speed. After 1 minute the display shows total or parrtial distance. Fine adjustment has been completed.
A wrong pulse / distance ratio entry (function "PULSE") exists if the display starts flashing during fine adjustment. The pulse / distance ratio is either below 500 or above 399 990. Repeat the calibration with the function "PULSE".
|

